Legacy Manual
Options
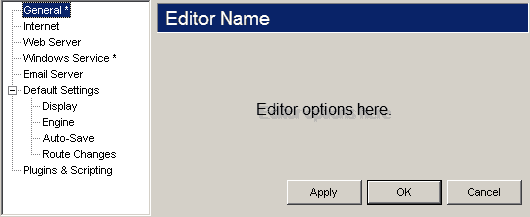
The options dialog is the main way to configure PingPlotter. There are a few interesting behaviors here that may not be obvious.
Applying (and identifying) Pending Changes
First, any changes made to these settings do not take affect until you either hit the "Apply" or "OK" button. The Apply button will become enabled when there are any changes pending to be applied.

The topics in the tree view with the * marks (asterisk) are the ones that have changed. Hitting the Apply key will write these changes to PingPlotter and put them into affect. Hitting the "OK" button will do the same, but will also close the options dialog. Hitting cancel will back out the changes that have not been applied. You can make changes to multiple areas before applying them.
Creating / Manipulating named configurations
PingPlotter Pro supports multiple named configurations. Right clicking the "Default Settings" option above will allow you to create more.
If you delete a named configuration that is currently in use by a target, that target will automatically change to use the first configuration in the list.
Making "on the fly" changes while still using PingPlotter
If you want to make changes in the options dialog will still interacting with the main PingPlottergram, hold the control key down while you launch the options dialog. The options dialog will stay on top, but it will allow you to interact with other areas of PingPlotter at the same time. As soon as you hit the "Apply" button, these changes will go into affect - without you having to close the options dialog.
**Some of the features listed in this topic are only available in PingPlotter Pro and/or PingPlotter Standard. See our product comparison page for more details**